Frankenstein Brownies: Monstrously Good and Allergy-Friendly
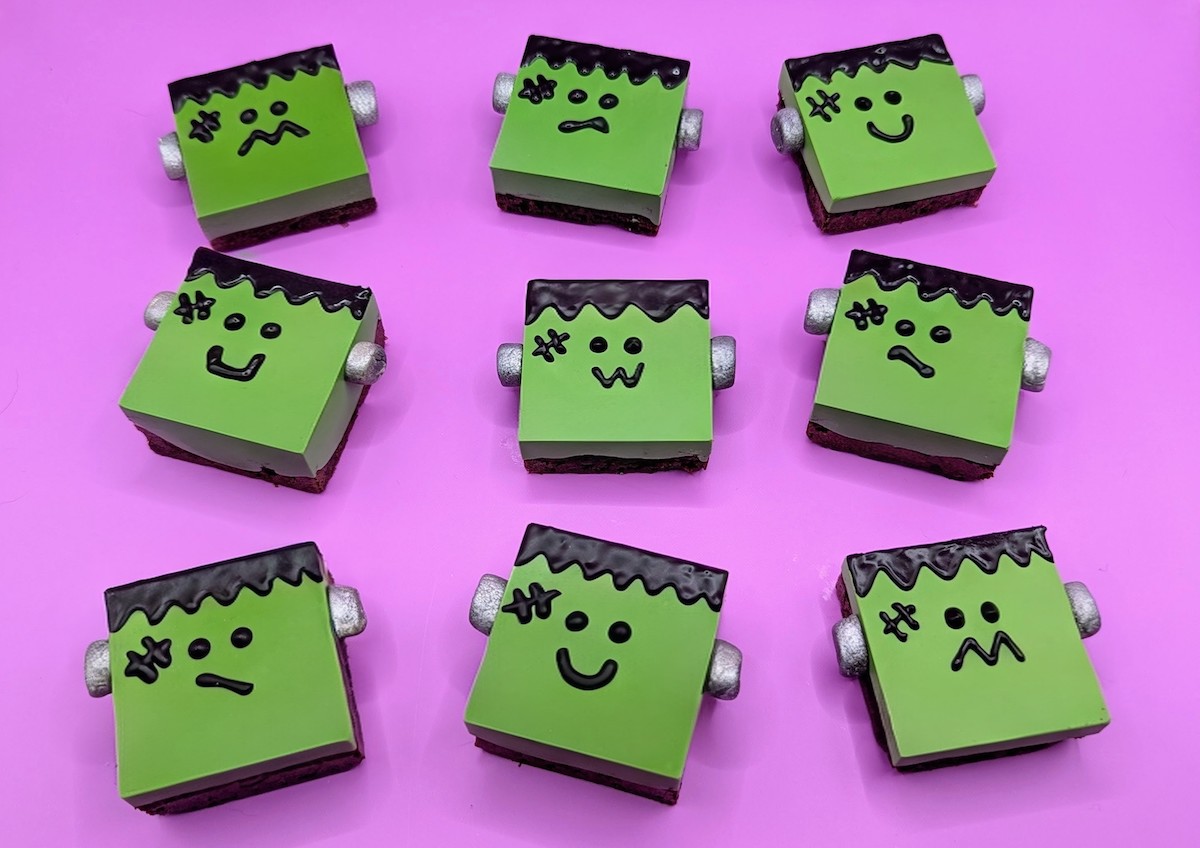
“It’s alive!” From the lab … to your dessert table. These spooky but sweet Frankenstein Brownies are a frightfully fun way to celebrate Halloween.
This recipe for my Kitchen Craft series for Allergic Living begins with a chewy, allergy-friendly brownie base. That is topped with a layer of green-tinted white chocolate – to create the signature monster glow.
Then, the real fun begins as you unleash your creativity to give each Frankenstein Brownie a personalized look. Add chocolate spikey hair, stitched scars, and expressive facial expressions.
These touches will truly bring your little monsters to life. For an elevated look, attach marshmallow bolts to the sides.
Guests won’t be able to resist these allergy-friendly brownies as a new Halloween favorite.
Making Frankenstein Brownies Free-From
Best of all, these Frankenstein Brownies are free from the top 9 allergens and gluten.
For the oil-based green and black colors, I turned to the Australian free-from brand Colour Mill. This free-from brand is available online at U.S. retailers, such as Walmart or Amazon. (In Canada, see here.)
For the allergy-friendly chocolate brownie mix, I chose the tasty Bake Me Healthy brand, but any allergy-friendly brownie mix of your preference will work. Enjoy Life’s famously allergy-friendly chocolate is a good choice for both the white and chocolate chips. The monster marshmallow bolts are optional, but so much fun. I hope you indulge in making them.
So, snap on a pair of kitchen gloves and get ready to unleash your inner mad scientist! And don’t forget to share photos of your Frankenstein Brownies with your friends, family, and Allergic Living on social media. We can’t wait to see what you create!
Makes: 18-22 Brownies
Free of: Top 9 allergens and gluten
Ingredients for Frankenstein Brownies
- 1 package of allergy-friendly brownie mix
- 2 cups white chocolate chips (e.g. Enjoy Life)
- 1 cup semi-sweet chocolate chips or dark chocolate morsels (e.g. Enjoy Life)
- Green oil-based food coloring (such as Colour Mill oil food coloring)
- Black oil-based food coloring (such as Colour Mill oil food coloring)
- Optional: Coconut Oil
- Optional: 1 package of allergy-friendly mini marshmallows
- Optional: Silver luster dust
Tools
- Square silicone pan molds
- Large mixing bowl
- 2 pots for double boiler or microwavable bowl or a melting pot
- Flexible spatula or spoon
- Parchment paper
- 2 cookie sheets
- Piping bag with small round writing tip or quart-size plastic bag
- Vinyl gloves
Recipe Tips
Brands are mentioned to assist readers. This recipe is not sponsored.
Instructions for Frankenstein Brownies
- Preheat oven to temperature shown on brownie mix. Place the flexible silicone pans on top of a sturdy sheet pan.
- Prepare brownie mix according to the package directions. Fill each silicone square no more than half way. Tap pan gently to level the batter. Once baked, remove brownies and set aside to cool completely.
Notes:
•Silicone pans can alter baking times, check early with a toothpick to determine if done.
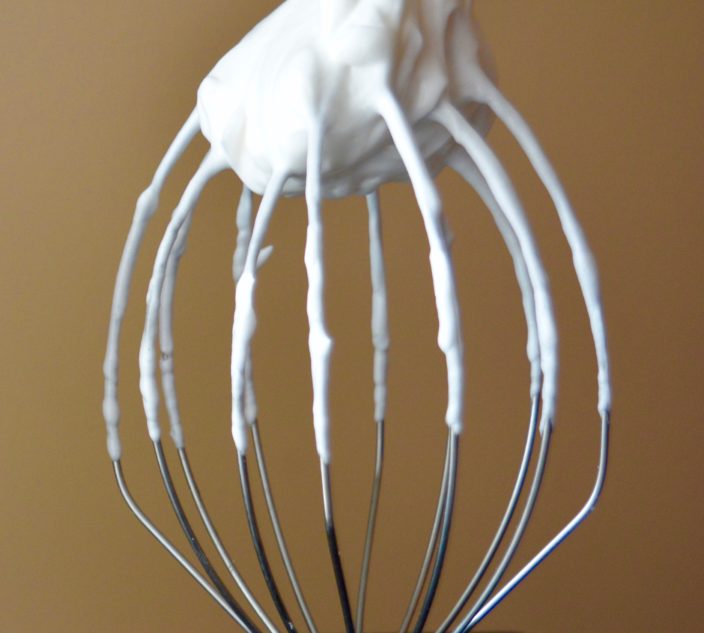
• Clean and dry silicone pans before the next step, making sure there are no crumbs or water droplets. Place silicone pans on top of a sturdy sheet pan. - Melt the white chocolate chips using the double boiler method or microwave method.
•Double boiler method: Pour a cup of water into a pot and over low heat. Place a smaller pot on top, making sure it sits above the water without touching it. Add the white chocolate and stir continuously until melted and smooth.
• Microwave method: Place white chocolate in a microwave safe bowl or silicone melting pot. Heat for 30 seconds, then stir to ensure even heating. Continue microwaving in 15 second intervals, stirring after each, until the chocolate is melted and smooth.
• Note: For a shiny finish, stir in ½ teaspoon of coconut oil for every 1 cup of chocolate chips.
- Once melted, slowly mix in green oil-based food coloring until you reach your desired shade. Avoid water-based coloring; it will seize the chocolate.
- Pour a thin layer (about a tablespoon) of the green melted chocolate into each clean silicone square. Tap the pan to level the chocolate and remove air bubbles. Place a brownie, top side down, into each silicone square. Repeat for each square.
- Set aside for a minimum of 30 minutes to allow chocolate to set at a cool room temperature. Or, my preferred method is to refrigerate about 10 minutes. Note: Chocolate bloom can sometimes occur when placed in the refrigerator.
- While allowing the chocolate and brownies to set, begin preparing semi-sweet or dark chocolate chips. Melt (same as in Step 3), and stir in approximately 10 drops black oil-based food coloring.
- Once first (green) chocolate has set, carefully pop out the chocolate-coated brownies from the silicone squares. Place on a parchment-lined cookie sheet.
- Get your piping bag or plastic bag with one very small, diagonal corner cut. Fill bag with the melted chocolate colored with black oil coloring. Begin piping Frankenstein’s hair, scars, eyes and mouth. (See photo.)
- Optional: To turn mini marshmallows into shiny silver “bolts,” very lightly coat each mini marshmallow with chocolate. Just dab your fingertip (covered with a vinyl glove) with melted chocolate and gently rub onto the marshmallow. Next, use a brush to cover with silver luster powder. Repeat until you have one marshmallow per Frankenstein. Cut each marshmallow in half, then press the sticky sides onto the brownies.
- Serve the same day. Keep away from direct sunlight to prevent melting.
Related Reading:
Furry Monster Chocolate Cake for Allergy-Friendly Halloween
Top 9-Free Teal Pumpkin Chocolate Layer Cake
Apple Pie Cupcakes with Cinnamon Cream ‘Cheese’ Frosting
Sign up for Allergic Living's free newsletter for more great allergy-friendly and gluten-free recipes, plus the latest food allergy research and news.